-->

分類

顯示具有 Unity 標籤的文章。 顯示所有文章

2018年1月12日 星期五

[Unity] use script to modify the value of SteamVR_AutoEnableVR and Virtual Reality Supported in PlayerSettings


reference: modify project settings via script
reference: YAML syntax

If somehow you need to build a non-VR version executable (e.g. for testing purpose) for your VR game, you need to turn off the VR support. Normally you can turn off VR support via the settings windows as the following:

normal way to set SteamVR Automatically Enable VR: Edit->Preferences->SteamVR


normal way to set Virtual Reality Supported: File->Build Settings->Player Settings->Other Settings


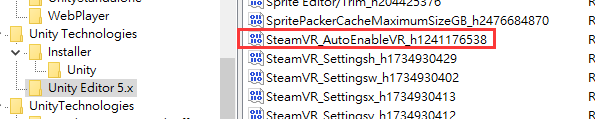
SteamVR Automatically Enable VR is a bool value of EditorPref, you can find its key in the Windows registry(if you are using Windows). The registry path is
[HKEY_CURRENT_USER\Software\Unity Technologies\Unity Editor 5.x]
if you are using Unity 5.x

Virtual Reality Supported is a bool value which is serialized by YAML format in YourProject/ProjectSettings/ProjectSettings.asset


If you need to change these settings values frequently, you can try to use script to do the switch for convenience.

To use script to modify the settings, first make sure Asset Serialization(Edit->Project Settings->Editor->Asset Serialization) is set as Force Text

Then use the following script to create an EditorWindow that can modify the value of SteamVR Automatically Enable VR(if you installed SteamVR plugin) and the value of Virtual Reality Supported in PlayerSettings

Note: different Unity versions may have different data structures for storing the ProjectSettings, so make sure you checked the content of ProjectSettings.asset and modify the script in order to access the values correctly 

public class EditorSettingsTestEditorWindow : EditorWindow
{

    [MenuItem("Window/EditorSettingsTestEditorWindow")]
    static void Init()
    {
        // Get existing open window or if none, make a new one:
        EditorSettingsTestEditorWindow window = (EditorSettingsTestEditorWindow)EditorWindow.GetWindow(typeof(EditorSettingsTestEditorWindow));
        window.Show();
    }
    const string ProjectSettingsAssetPath = "ProjectSettings/ProjectSettings.asset";

    private bool bSteamVRAutoEnable = false;
    private bool bVRSupported = false;
    private SerializedProperty BuildTargetVRSettings;
    private SerializedObject projectSettingsManager;
    private void OnEnable()
    {
        bSteamVRAutoEnable = EditorPrefs.GetBool("SteamVR_AutoEnableVR");
        Debug.Log("bSteamVRAutoEnable: " + bSteamVRAutoEnable);

        projectSettingsManager = new SerializedObject(UnityEditor.AssetDatabase.LoadAllAssetsAtPath(ProjectSettingsAssetPath)[0]);
        BuildTargetVRSettings = projectSettingsManager.FindProperty("m_BuildTargetVRSettings");
        int arrSize = BuildTargetVRSettings.arraySize;
        for(int i = 0; i < arrSize; i++)
        {
            SerializedProperty element = BuildTargetVRSettings.GetArrayElementAtIndex(i);

            SerializedProperty buildTarget = element.FindPropertyRelative("m_BuildTarget");
            string buildTargetValue = buildTarget.stringValue;
            if(buildTargetValue == "Standalone")
            {
                SerializedProperty enabled = element.FindPropertyRelative("m_Enabled");
                bVRSupported = enabled.boolValue;
                Debug.Log("got vr supported: " + bVRSupported);
            }
        }
    }

    void OnGUI()
    {
        bool tempSteamVRAutoEnable = bSteamVRAutoEnable;
        tempSteamVRAutoEnable = EditorGUILayout.ToggleLeft("SteamVR_AutoEnableVR", bSteamVRAutoEnable);
        if(tempSteamVRAutoEnable != bSteamVRAutoEnable)
        {
            bSteamVRAutoEnable = tempSteamVRAutoEnable;
            EditorPrefs.SetBool("SteamVR_AutoEnableVR", bSteamVRAutoEnable);
        }

        bool tempVRSupported = bVRSupported;

        tempVRSupported = EditorGUILayout.ToggleLeft("vr supported", bVRSupported);
        if(tempVRSupported != bVRSupported)
        {
            bVRSupported = tempVRSupported;
            int arrSize = BuildTargetVRSettings.arraySize;
            for (int i = 0; i < arrSize; i++)
            {
                SerializedProperty element = BuildTargetVRSettings.GetArrayElementAtIndex(i);

                SerializedProperty buildTarget = element.FindPropertyRelative("m_BuildTarget");
                string buildTargetValue = buildTarget.stringValue;
                if (buildTargetValue == "Standalone")
                {
                    SerializedProperty enabled = element.FindPropertyRelative("m_Enabled");
                    enabled.boolValue = bVRSupported;
                    projectSettingsManager.ApplyModifiedProperties();
                }
            }
        }
    }
}

2017年7月11日 星期二

[Note] Unity Profiler enhancement

split binary profiler data (in order to view more frames in profiler):
http://www.itdadao.com/articles/c19a766424p0.html

calculate FPS:
https://github.com/MattRix/UnityDecompiled/blob/master/UnityEditor/UnityEditor/GameViewGUI.cs
http://www.jianshu.com/p/1c22321d88af
https://gamedev.stackexchange.com/questions/118934/unity-stats-framerate-vs-time-deltatime
note about FPS calculation:
1. UnityStats.frameTime, UnityStats.renderTime seem can only be read in OnGUI()
2. the FPS in Profiler(and Unity stats window) seems to match the value (1.0f / (UnityStats.frameTime + UnityStats.renderTime)), not sure but currently my experimental results match the calculation

package download link:
https://drive.google.com/file/d/1weD2QOAh7wyUWINor8Na0Ix-d__15vlv/view?usp=sharing

2017年3月22日 星期三

Unity depth mask using additional camera

reference
sample unity package
Note: this trick doesn't work with Unity SteamVR plugin's CameraRig
Note: this is a different implementation from the depth mask from unity wiki

The basic idea of depth mask is just like normal z-test. You use transparent objects (say mask objects) that are closer to the camera so other objects behind the mask objects will not pass the z-test and not be rendered.

However the problem is that under the same camera rendering, transparent objects can't be considered as passed z-test when opaque objects are behind them.

So the trick is just like the reference link above, use another camera (say camera2) that draws masked object after previous camera(say camera1) rendered the transparent masks.

In this case, camera1 draws first and makes transparent objects write to the z-buffer, then when camera2 is drawing, since the z-buffer is occupied by the transparent objects, the object behind the mask will fail the z-test.

Apparently, the camera1 and camera2 need some settings to achieve the mask effect. Just like the reference link, camera1 needs to render before camera2, so the "depth" property in Unity camera needs to be setup. Just set camera2's depth be larger than camera1's depth to achieve the rendering order.

Then since camera2 draws on top of camera1, camera2's "clear flags" needs to be set as "Don't clear".

Make sure that camera2 has exactly the same camera properties and 3D objects settings as camera1(transforms, fov...), otherwise the rendered scenes will not match.

Add transparent objects into the scene as mask. The transparent objects need to write into the z-buffer, you can use the shader code below to achieve this.

Finally, add a User Layer in Unity (say MaskedObject as the layer name), set masked object to be in the MaskedObject layer, set camera2's culling mask to MaskedObject, then try to move the masked object behind the transparent masks.


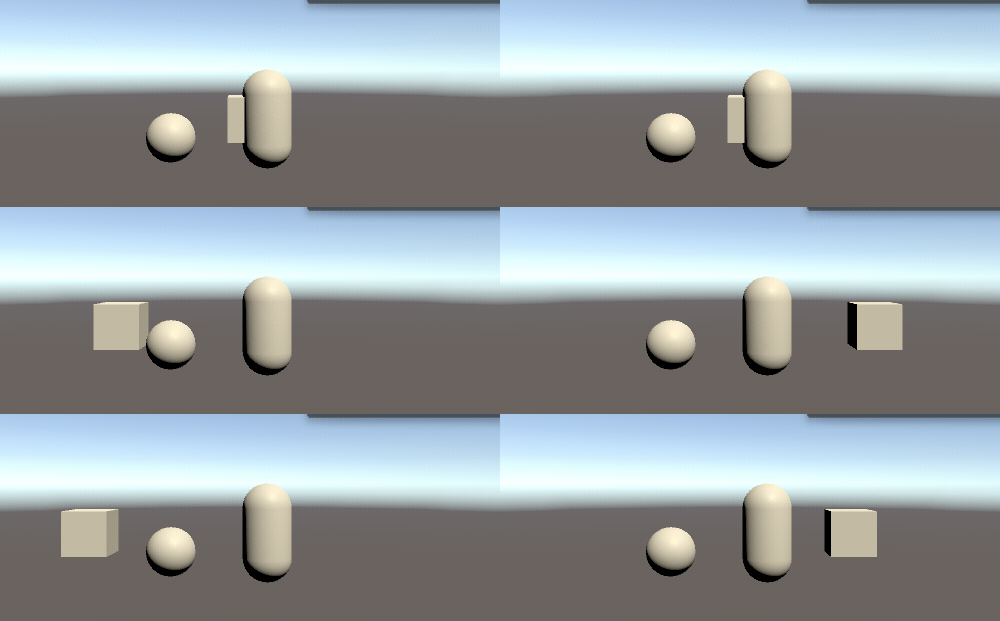
here is the result

the moving cube is masked at certain positions, those positions actually are occupied by transparent cubes and the transparent cubes occlude the masked cube.

the shader code for transparent mask object
Shader "SimpleTransparentZWrite"
{
 SubShader
 {
  Tags{ "Queue" = "Transparent" }
  Pass{
   Blend SrcAlpha OneMinusSrcAlpha
   ZTest LEqual
   Cull Back

   ZWrite On
   CGPROGRAM
   #pragma vertex vert
   #pragma fragment frag
   #include "UnityCG.cginc"
   struct appdata {
    float4 vertex : POSITION;
   };
   struct v2f {
    float4 pos : SV_POSITION;
   };
   v2f vert(appdata v) {
    v2f o;
    o.pos = UnityObjectToClipPos(v.vertex);
    return o;
   }
   half4 frag(v2f i) : SV_Target{
    return half4(0,0,0,0.0);
   }
   ENDCG
  }
 }
}

2017年1月23日 星期一

fixed Unity standard asset water reflection in VR environmemt(SteamVR only)

[DOWNLOAD the unity package] (note: need to import Unity SteamVR plugin first, tested with SteamVR plugin 1.1.1 and SteamVR plugin 1.2. Unity may show compilation error if the SteamVR plugin is not compatible with the script for the water, you can fix the script by following the instructions at the line where compilation error occurs)
The water module  from Unity standard asset has problem with reflection under VR environment.
This link has the solution to reflection under VR environment in Unity.
https://forum.unity3d.com/threads/5-4-beta15-reflection-rendering-wrong-in-openvr-htc-vive.398756/

Simply apply this solution to the water module's source code then the problem is solved.

02/10/2017 update(package is also updated for the download link):
Fixed the missing prefab problem from previous unity package. Added instructions to fix SteamVR plugin incompatible problem.

02/03/2017 update(package is also updated for the download link):
some modifications for single pass stereo rendering, removed the discontinuous texture sampling artifacts when single pass stereo rendering turned on.

Some notes:
The reflection use a camera for reflection. The reflection camera is at the reflection pose of the main camera by the reflection surface.

The reflection camera makes a render texture for the reflection surface plane.

The reflection camera modified it's projection matrix so that its clip plane will be the reflection plane(so that object between reflection camera and the reflection surface will not be rendered). It transforms it's view frustum to be oblique view frustum.
Oblique view frustum derivation
view frustum culling(the relationship between view frustum plane and projection matrix)
reflection matrix
oblique view frustum transform implemented by C#

The reflection camera has different pose for left eye and right eye in VR enivronment:
Vector3 eyePos = cam.transform.TransformPoint(SteamVR.instance.eyes[0].pos);
Quaternion eyeRot = cam.transform.rotation * SteamVR.instance.eyes[0].rot;
Matrix4x4 projectionMatrix = GetSteamVRProjectionMatrix(cam, Valve.VR.EVREye.Eye_Left);

 Vector3 eyePos = cam.transform.TransformPoint(SteamVR.instance.eyes[1].pos);
 Quaternion eyeRot = cam.transform.rotation * SteamVR.instance.eyes[1].rot;
 Matrix4x4 projectionMatrix = GetSteamVRProjectionMatrix(cam, Valve.VR.EVREye.Eye_Right);

The reflection camera has different render textures for left and right eye:
render the render texture for left and right eye on the same texture by specifying the range where the texture of each eye should be drawn:
    private static readonly Rect LeftEyeRect = new Rect(0.0f, 0.0f, 0.5f, 1.0f);
    private static readonly Rect RightEyeRect = new Rect(0.5f, 0.0f, 0.5f, 1.0f);
    ...
    m_ReflectionCamera.rect = camViewport;//camViewport is LeftEyeRect or RightEyeRect
So the reflection render texture's left half part is for left eye, right half part is for right eye.
And when sampling the reflection render texture, the uv coordinates need to be modified according to which eye is being used:
vert shader
o.screenPos = ComputeScreenPos(o.pos);
frag shader
half4 screenWithOffset = i.screenPos;
#ifndef UNITY_SINGLE_PASS_STEREO
if (unity_CameraProjection[0][2] < 0)
{
screenWithOffset.x = (screenWithOffset.x * 0.5f);//make x as 0 ~ 0.5
}
else if (unity_CameraProjection[0][2] > 0)
{
screenWithOffset.x = (screenWithOffset.x * 0.5f) + (screenWithOffset.w * 0.5f);//0.5~1
}
#endif

for Single Pass Stereo Rendering case, the "screenWithOffset" will be handled automatically since single pass stereo rendering treats the texture as a combined texture for left and right eye. It will use left half texture for left eye, right half texture for right eye, we don't need to modify the screenWithOffset.x as the case of non single pass stereo rendering

2016年9月7日 星期三

Unity 2d wave-like motion mesh

reference

this needs one script attached to an empty GameObject and one material with texture

result video


public class WaveMesh : MonoBehaviour {
    private Mesh m_Mesh;
    private float size = 0.5f;
    private int gridSize = 8;
    public float waveFrequency = 5.0f;
    public float sizeScale = 0.5f;
    // Use this for initialization
    void Start () {
 
 }
 
 // Update is called once per frame
 void Update () {
        int dotsPerRow = gridSize + 1;
        int halfGridSize = gridSize / 2;
        Vector3[] verts = m_Mesh.vertices;
        float time = Time.time;
        for (int i = 0; i < dotsPerRow; i++)
        {
            for (int j = 0; j < dotsPerRow; j++)
            {
                int xIndex = j - halfGridSize;
                int yIndex = halfGridSize - i;
                float xSign = Mathf.Sign(xIndex);
                float ySign = Mathf.Sign(yIndex);
                float xPosTarget = xIndex;
                float yPosTarget = yIndex;
                //if (xIndex != 0 && yIndex != 0)
                {
                    Vector2 wave = waveCoord(xIndex, yIndex, halfGridSize, time);
                    verts[i * dotsPerRow + j] = new Vector3(wave.x, wave.y, 0.0f);
                }           
            }
        }
        m_Mesh.vertices = verts;
    }

    private Vector2 waveCoord(float xIndex, float yIndex, float halfGridSize, float time)
    {
        Vector2 p = new Vector2(xIndex, yIndex);
        
        p = p * sizeScale;
        float len = p.magnitude;
        float sincValue = sinc(p.magnitude * 0.5f);
        float temp = Mathf.Cos(time * waveFrequency - len / sizeScale) * 0.5f * sizeScale * sincValue;
        Vector2 offset = new Vector2(Mathf.Sign(xIndex) * temp, Mathf.Sign(yIndex) * temp);
        return offset + p;
    }

    private float clampTimeToPeriod(float time, float period)
    {
        return time - Mathf.Floor(time / period);
    }

    private float sinc(float x)
    {
        if(Mathf.Abs(x) < 0.0001f)
        {
            return Mathf.Sin(x);
        }
        return Mathf.Sin(x) / x;
    }

    void Awake()
    {
        GameObject plane = new GameObject("CreatedWaveMesh");
        MeshFilter meshFilter = (MeshFilter)plane.AddComponent(typeof(MeshFilter));
        meshFilter.mesh = CreateMesh();
        m_Mesh = meshFilter.mesh;
        MeshRenderer renderer = plane.AddComponent(typeof(MeshRenderer)) as MeshRenderer;
        //Load your material here
        Material newMat = Resources.Load("Materials/WaveStandardMaterial", typeof(Material)) as Material;
        renderer.material = newMat;
        //plane.transform.localScale = new Vector3(desiredSize / gridSize, desiredSize / gridSize, -1);
        plane.transform.localScale = new Vector3(1, 1, -1);
        plane.transform.localPosition = new Vector3(0.64f, 0.38f, -3);
    }

    Mesh CreateMesh()
    {
        Mesh m = new Mesh();
        m.name = "ScriptedMesh";
        /*
        case for gridSize == 4, there are 4x4=16 grids, dotsPerRow is 4+1=5
        .....
        .....
        .....
        .....
        .....
        */
        int dotsPerRow = gridSize + 1;
        int halfGridSize = gridSize / 2;
        Vector3[] verts = new Vector3[dotsPerRow * dotsPerRow];
        for (int i = 0; i < dotsPerRow; i++)
        {
            for(int j = 0; j < dotsPerRow; j++)
            {
                verts[i * dotsPerRow + j] = new Vector3(j - halfGridSize, halfGridSize - i, 0.0f);
            }
        }
        m.vertices = verts;

        Vector2[] uvs = new Vector2[verts.Length];
        float dotsPerRowf = (float)dotsPerRow;
        for (int i = 0; i < dotsPerRow; i++)
        {
            for (int j = 0; j < dotsPerRow; j++)
            {
                uvs[i * dotsPerRow + j] = new Vector2((float)j / dotsPerRowf, 1.0f - (float)i / dotsPerRowf);
            }
        }
        m.uv = uvs;

        int numTris = gridSize * gridSize * 2;
        int[] tris = new int[numTris * 3];
        
        for(int i = 0; i < gridSize; i++)
        {
            for(int j = 0; j < gridSize; j++)
            {
                int startIndex = 6 * (i * gridSize + j);
                tris[startIndex] = i * dotsPerRow + j;
                tris[startIndex + 1] = (i + 1) * dotsPerRow + j;
                tris[startIndex + 2] = i * dotsPerRow + j + 1;
                tris[startIndex + 3] = (i + 1) * dotsPerRow + j;
                tris[startIndex + 4] = (i + 1) * dotsPerRow + j + 1;
                tris[startIndex + 5] = i * dotsPerRow + j + 1;
            }
        }
        m.triangles = tris;
        m.RecalculateNormals();

        return m;
    }
}

2016年7月19日 星期二

Unity failed wireframe shader

tried to assign uv for each vertex of triangle as (0,0), (0,1), (1,0) then use interpolated uv value in fragment shader to determine if it should be drawn as edge of the triangle

C# script:


using UnityEngine;
using System.Collections;
using System.Collections.Generic;
public class SetTriangleVertUV4ForWireframe : MonoBehaviour {
    private enum UVType
    {
        none,
        t00,
        t01,
        t10
    }
    private Mesh mMesh;
    private int[] triangleIndices;
    private Vector2[] mUV;
    // Use this for initialization
    void Start()
    {
        mMesh = GetComponent().mesh;
        triangleIndices = mMesh.triangles;
        mUV = new Vector2[mMesh.vertices.Length];
        for (int i = 0; i < mUV.Length; i++)
        {
            //UVType.none
            mUV[i] = new Vector2(-1.0f, -1.0f);
        }
        for (int i = 0; i < triangleIndices.Length; i += 3)
        {
            Vector2 v0 = mUV[triangleIndices[i]];
            Vector2 v1 = mUV[triangleIndices[i + 1]];
            Vector2 v2 = mUV[triangleIndices[i + 2]];
            HashSet uvTypeSet = new HashSet();
            HashSet vertIndexSet = new HashSet();
            uvTypeSet.Add(UVType.t00);
            uvTypeSet.Add(UVType.t01);
            uvTypeSet.Add(UVType.t10);
            vertIndexSet.Add(i);
            vertIndexSet.Add(i + 1);
            vertIndexSet.Add(i + 2);

            Dictionary uvTypeDic = new Dictionary();
            addUVType(uvTypeDic, v0, i);
            addUVType(uvTypeDic, v1, i + 1);
            addUVType(uvTypeDic, v2, i + 2);


            foreach (KeyValuePair pair in uvTypeDic)
            {
                UVType type = pair.Key;
                if (uvTypeSet.Contains(type))
                {
                    uvTypeSet.Remove(type);
                    vertIndexSet.Remove(pair.Value);
                }
            }

            //uvTypeSet now contains UVType that are not used
            List resultUVType = new List();
            List resultIndices = new List();
            foreach (UVType type in uvTypeSet)
            {
                resultUVType.Add(type);
            }
            resultUVType.Sort();
            foreach (int index in vertIndexSet)
            {
                resultIndices.Add(index);
            }
            resultIndices.Sort();
            //convert unused UVType to Vector2 as UV coord and save to uv4
            for (int j = 0; j < resultIndices.Count; j++)
            {
                mUV[triangleIndices[resultIndices[j]]] = buildVector2ByUVType(resultUVType[j]);
            }
        }
        mMesh.uv4 = mUV;
    }

    private Vector2 buildVector2ByUVType(UVType type)
    {
        switch (type)
        {
            case UVType.t00:
                return new Vector2(0.0f, 0.0f);
            case UVType.t01:
                return new Vector2(0.0f, 1.0f);
            case UVType.t10:
                return new Vector2(1.0f, 0.0f);
            default:
                return new Vector2(-1.0f, -1.0f);
        }
    }

    private void addUVType(Dictionary dic, Vector2 v, int index)
    {
        UVType uvType = checkUVType(v);
        if (uvType != UVType.none && !dic.ContainsKey(uvType))
        {
            dic.Add(uvType, index);
        }
    }

    private UVType checkUVType(Vector2 v)
    {
        if (Mathf.Approximately(v.x, -1.0f))
        {
            return UVType.none;
        }
        if (Mathf.Approximately(v.x, 1.0f))
        {
            return UVType.t10;
        }
        if (Mathf.Approximately(v.y, 1.0f))
        {
            return UVType.t01;
        }
        return UVType.t00;
    }
}


Shader code:

Shader "Unlit/TestWireframeUV4"
{
 Properties
 {
  _MainTex ("Texture", 2D) = "white" {}
 }
 SubShader
 {
  Tags { "RenderType"="Opaque" }
  LOD 100

  Pass
  {
   CGPROGRAM
   #pragma vertex vert
   #pragma fragment frag
   // make fog work
   #pragma multi_compile_fog
   
   #include "UnityCG.cginc"

   struct appdata
   {
    float4 vertex : POSITION;
    float2 uv : TEXCOORD0;
    float2 uv4 : TEXCOORD3;
   };

   struct v2f
   {
    float2 uv : TEXCOORD0;
    float2 uv4 : TEXCOORD3;
    float4 vertex : SV_POSITION;
   };

   sampler2D _MainTex;
   float4 _MainTex_ST;
   
   v2f vert (appdata v)
   {
    v2f o;
    o.vertex = mul(UNITY_MATRIX_MVP, v.vertex);
    o.uv = TRANSFORM_TEX(v.uv, _MainTex);
    o.uv4 = v.uv4;
    return o;
   }
   
   fixed4 frag (v2f i) : SV_Target
   {
    fixed4 col = tex2D(_MainTex, i.uv);
    if (length(i.uv4) > 0.7 && length(i.uv4) < 0.9) {
     //treated as edge of triangle
     return fixed4(0, 0, 0, 1);
    }
    return col;
   }
   ENDCG
  }
 }
}


result:
as you can see, some triangles don't have correct UV(at the top of the sphere). This is because sometimes the UV coordinates have conflicts in one triangle (e.g. (1,0), (1,0) for two vertices, in that case the second UV coordinate is discarded)


2016年6月19日 星期日

Unity 2d water blob

references:
[1] http://codeartist.mx/tutorials/liquids/

based on [1], I made a shader that combines Unity default sprite shader and the metaball calculation. This shader is used on Sprite of water particle, not on the Render Textures as the implementation of [1]

here is the result video


shader code:

Shader "2D/SpriteMetaball"
{
 Properties
 {
  _MainTex ("Texture", 2D) = "white" {}
  _Color("Tint Color", Color) = (1,1,1,1)
  _EdgeThreshold("EdgeThreshold", Range(0,1)) = 0.2
  [MaterialToggle] PixelSnap("Pixel snap", Float) = 0
  _CenterSaturation("CenterSaturation", Range(1,100)) = 2
  _StepSize("StepSize", Range(0.1,1)) = 1
 }
 SubShader
 {
  Tags 
  {
   "Queue" = "Transparent"
   "IgnoreProjector" = "True"
   "RenderType" = "Transparent"
   "PreviewType" = "Plane"
   "CanUseSpriteAtlas" = "True"
  }

  Cull Off
  Lighting Off
  ZWrite Off
  Blend One OneMinusSrcAlpha

  Pass
  {
   CGPROGRAM
   #pragma vertex vert
   #pragma fragment frag
   #pragma multi_compile DUMMY PIXELSNAP_ON
   #pragma shader_feature ETC1_EXTERNAL_ALPHA
   
   #include "UnityCG.cginc"

   struct appdata
   {
    float4 vertex : POSITION;
    fixed4 color : COLOR;
    float2 uv : TEXCOORD0;
   };

   struct v2f
   {
    float2 uv : TEXCOORD0;
    fixed4 color : COLOR;
    float4 vertex : SV_POSITION;
   };

   sampler2D _MainTex;
   float4 _MainTex_ST;
   //tint color
   float4 _Color;
   //when texture color's alpha is below _EdgeThreshold, that color is discarded and the edge of rendered result formed
   //but it turns out that I got the result I want with _EdgeThreshold as 0...
   half _EdgeThreshold;
   /*
    higher _CenterSaturation makes the color from texture saturated faster(easier to become 1),
    since the default sprite texture this shader used has higher alpha in the center, 
    this value determined the how much the center part of rendered result is saturated 
   */
   half _CenterSaturation;
   //I think this value originally is related to metaball isosurface calculation,
   //but it may not be so useful in current implementation since I multiply texture's alpha which is formed as radial gradient 
   half _StepSize;

   sampler2D _AlphaTex;

   v2f vert (appdata v)
   {
    v2f o;
    o.vertex = mul(UNITY_MATRIX_MVP, v.vertex);
    o.uv = TRANSFORM_TEX(v.uv, _MainTex);
    #ifdef PIXELSNAP_ON
    o.vertex = UnityPixelSnap(o.vertex);
    #endif
    return o;
   }

   float4 SampleSpriteTexture(float2 uv)
   {
    float4 color = tex2D(_MainTex, uv);

#if ETC1_EXTERNAL_ALPHA
    // get the color from an external texture (usecase: Alpha support for ETC1 on android)
    color.a = tex2D(_AlphaTex, uv).r;
#endif //ETC1_EXTERNAL_ALPHA

    return color;
   }
   
   float4 frag (v2f i) : SV_Target
   {
    float4 col = SampleSpriteTexture(i.uv);
    
    float4 finalColor = col;
    if (finalColor.a > _EdgeThreshold) {
     //tint color
     finalColor *= _Color;
     //metaball isosurface
     finalColor.rgb *= float3(floor(finalColor.r * _CenterSaturation)*_StepSize, floor(finalColor.g * _CenterSaturation)*_StepSize, floor(finalColor.b * _CenterSaturation)*_StepSize);
     //this line kind of makes the isosurface of metaball formed by floor function and _StepSize meaningless, but I think it makes the rendered result looks better    
     finalColor.rgb *= finalColor.a;
    }
    else {
     discard;
    }

    return finalColor;
   }
   ENDCG
  }
 }
 Fallback "VertexLit"
}


here is the texture used for the water particle's SpriteRenderer(it's white with alpha, so you might only see a blank block here, but there is an image)


here is the settings of water particle:
you need to create a material with the shader code
the WaterBlob Sprite is the white image above(renamed from "RadialGradient" to "WaterBlob" in my project)

2016年6月3日 星期五

Unity Android native crash debug

reference
1. unpack the .apk you build with zip or 7-zip, assume it unpack to the folder "YourProject"
2. copy "YourProject/lib/armeabi-v7a/libmono.so" to you Android ndk objdump tool folder(e.g.: "Android_NDK/android-ndk-r10e/toolchains/aarch64-linux-android-4.9/prebuilt/windows/aarch64-linux-android/bin")
3. use terminal or cmd in Windows : objdump.exe -S libmono.so >> out.txt
4. check out.txt

2016年5月3日 星期二

unity讓物件面對滑鼠方向(make 3D object face to mouse cursor)

有人問了這問題
就放個code


using UnityEngine;
using System.Collections;

public class TraceMouse : MonoBehaviour {
    private Camera mainCamera;
 // Use this for initialization
 void Start () {
        mainCamera = Camera.main;
    }
 
 // Update is called once per frame
 void Update () {
        //transform object to screen space
        Vector3 transformScreenPosition = mainCamera.WorldToScreenPoint(transform.position);
        //use object's z in screen space as mouse's z in screen space, then calculate mouse's world position 
        Vector3 mouseWorldPosition = mainCamera.ScreenToWorldPoint(new Vector3(Input.mousePosition.x, Input.mousePosition.y, transformScreenPosition.z));
        //direction from object to mouse
        Vector3 dir = (mouseWorldPosition - transform.position).normalized;
        //set direction to object's local axis
        transform.up = dir;
    }
}

2016年4月26日 星期二

Mosaic Shader for Unity

one of my friends wanted to make 3D h-game and he wondered how to make mosaic effect in 3D, so I did some research and made this


references:
风宇冲Unity3D教程学院 第二十三讲GrabPass
Dr.Dobb's Understanding Photomosaics
Shader "Custom/MosaicShader" {
 Properties{
  _MainTex("Base (RGB)", 2D) = "white" {}
 }

 SubShader
 {
  Tags{ "Queue" = "Transparent" }

  GrabPass
  {
   "_MyGrabTexture"
  }

  pass
  {
   Name "pass2"
   CGPROGRAM
   #pragma vertex vert
   #pragma fragment frag

   #include "UnityCG.cginc"
   sampler2D _MyGrabTexture;
   float4 _MyGrabTexture_ST;

   struct VertexIn
   {
    float4 vertex : POSITION;
    float2 texcoord : TEXCOORD0;
    float4 screenPos : TEXCOORD1;
   };
   struct VtoF 
   {
    float4  pos : SV_POSITION;
    float2  uv : TEXCOORD0;
    float4 screenPos : TEXCOORD1;
   };

   VtoF vert(VertexIn v)
   {
    VtoF o;
    o.pos = mul(UNITY_MATRIX_MVP,v.vertex);
    o.uv = TRANSFORM_TEX(v.texcoord,_MyGrabTexture);
    /*
    //source code in UnityCG.cginc
    inline float4 ComputeScreenPos(float4 pos) {
     //if we do perspective divide here(pos/pos.w), we got pos.x in range (-1, 1)(NDC)
     float4 o = pos * 0.5f;
     //if we do perspective divide here(o/pos.w), we got o.x in range (-0.5,0.5)
     #if defined(UNITY_HALF_TEXEL_OFFSET)
     o.xy = float2(o.x, o.y*_ProjectionParams.x) + o.w * _ScreenParams.zw;
     #else
     o.xy = float2(o.x, o.y*_ProjectionParams.x) + o.w;
     #endif

     o.zw = pos.zw;
     //if we do perspective divide here(o/pos.w), we got o.x in range (0,1)
     //o.x / pos.w in range(-0.5, 0.5), o.w / pos.w = 0.5
     //(o.x + o.w) / pos.w in range (-0.5 + 0.5, 0.5 + 0.5) = (0,1)
     return o;
    }
    */
    o.screenPos = ComputeScreenPos(o.pos);
    return o;
   }
   float4 frag(VtoF i) : COLOR
   {
    //perspective divide for screen pos to normalize p to be in the range of (0,1)
    fixed4 p = i.screenPos / i.screenPos.w;
    float4 tmp = float4(0, 0, 0, 0);

    //http://docs.unity3d.com/462/Documentation/Manual/SL-BuiltinValues.html
    //_ScreenParams: screen dimension in pixel
    //p.x*_ScreenParams.x: get x coordinate on screen, unit: pixel
    //floor(p.x*_ScreenParams.x / 10) * 10: 100 -> 100, 101 -> 100, 102 -> 100 ..., 109 -> 100, 110 -> 110
    [unroll(10)]
    for (float ii = floor(p.x*_ScreenParams.x / 10) * 10; ii < floor(p.x*_ScreenParams.x / 10) * 10 + 10; ii += 1)
    {
     [unroll(10)]
     for (float jj = floor(p.y *_ScreenParams.y / 10) * 10; jj < floor(p.y *_ScreenParams.x / 10) * 10 + 10; jj += 1)
     {
      //sample pixel color on screen
      tmp += tex2D(_MyGrabTexture, float2(ii / _ScreenParams.x, 1 - jj / _ScreenParams.y));
     }
    }
    return tmp / 100;//average samples
   }
   ENDCG
  }
 }
}

2016年3月27日 星期日

Unity Shader

分兩種: Surface Shader及vert, frag
Surface最後還是會compile成vert, frag, Surface就是比較總合的一種寫法
Surface的語法定義
surface必須照這方式宣告:
#pragma surface surfaceFunction lightModel [optionalparams]

lightModel:定義和光源互動的規則
lightModel宣告
LightModel宣告規則
見Lighting Model declaration
#pragma surface surfaceFunction LightModelName [optionalparams]
half4 LightingLightModelName (SurfaceOutput s, half3 lightDir, half atten);

Surface要定義vert, frag:
#pragma surface surf Lambert vertex:vert finalcolor:mycolor
void vert (inout appdata_full v, out Input o) { UNITY_INITIALIZE_OUTPUT(Input,o); o.customColor = abs(v.normal); }
void mycolor (Input IN, SurfaceOutput o, inout fixed4 color) { color *= _ColorTint; }

2016年3月17日 星期四

unity android plugin

link

unity doc

Editor\Data\PlaybackEngines\AndroidPlayer\Variations\mono\Release\Classes

sdk path : Edit -> Preference -> Externel tool -> Android
C:/Users/XXX/AppData/Local/Android/sdk

Android build:
exportJar: in gradle tasks "other"
built jar: in ProjectName/app/release

trouble shooting:

just copy Android manifest to Unity
delete Theme light, Theme Dark related resources
copy (Android) app/res to (Unity)Plugins/Android
remove unused lib(jar) in Android

一、编译apk时。================================================
1.编译输出apk时报错。
Error building Player: CommandInvokationFailure: Failed to re-package resources. See the Console for details.
D:\android-sdk-windows\build-tools\19.1.0\aapt.exe package --auto-add-overlay -v -f -m -J gen -M AndroidManifest.xml -S "res" -I "D:/android-sdk-windows/platforms/android-21\android.jar" -F bin/resources.ap_
stderr[
res\values\styles.xml:7: error: Error retrieving parent for item: No resource found that matches the given name 'Theme.AppCompat.Light'.
res\values-v11\styles.xml:7: error: Error retrieving parent for item: No resource found that matches the given name 'Theme.AppCompat.Light'.
res\values-v14\styles.xml:8: error: Error retrieving parent for item: No resource found that matches the given name 'Theme.AppCompat.Light.DarkActionBar'.
]
答:在styles.xml没有 'Theme.AppCompat.Light 和 Theme.AppCompat.Light.DarkActionBar 这两个皮肤。。。
android 皮肤的使用 在这里。。
http://developer.android.com/guide/topics/ui/themes.html
或者改为:
<resources>
    <!--
        Base application theme, dependent on API level. This theme is replaced
        by AppBaseTheme from res/values-vXX/styles.xml on newer devices.
    -->
    <style name="AppBaseTheme" parent="android:Theme.Light.NoTitleBar">
        <!--
            Theme customizations available in newer API levels can go in
            res/values-vXX/styles.xml, while customizations related to
            backward-compatibility can go here.
        -->
    </style>
    <!-- Application theme. -->
    <style name="AppTheme" parent="AppBaseTheme">
        <!-- All customizations that are NOT specific to a particular API-level can go here. -->
    </style>
</resources>
这样也可解决。

2、如果Unity打包过程出现类似下面这样的错误提示:
     Error building Player: CommandInvokationFailure: Failed to re-package resources. See the Console for details.
     X:\Android SDK\adt-bundle-windows-x86-XXXXXX\sdk\build-tools\X.1.0\aapt.exe package --auto-add-overlay -v -f -m -J gen -M AndroidManifest.xml -S "res" -I "E:/Android SDK/adt-bundle-windows-x86-XXXXXX/sdk/platforms/android-X\android.jar" -F bin/resources.ap_
表示在Android外挂项目里的res文件夹里有的地方的xml设置文件里的设置内容找不到,比如一条设置指向一个名为bnt的png图片文件,但这个图片的名字不是这个。

    3、如果Unity打包过程出现类似下面这样的错误提示:
    Error building Player: CommandInvokationFailure: Unable to convert classes into dex format. See the Console for details.
    X:\Program Files\Java\jdk1.X.X_XX\bin\java.exe -Xmx1024M -Dcom.android.sdkmanager.toolsdir="X:/Android SDK/adt-bundle-windows-x86-20130729/sdk\tools" -Dfile.encoding=UTF8 -jar "X:/Program Files/Unity/Editor/Data/BuildTargetTools/AndroidPlayer\sdktools.jar" -
表示你的你复制过来的libs文件夹里的东西和Unity的有冲突,通常是含有和Unity的classes.jar相同内容的jar文件。
二、安装后运行报错。================================================================
1.如果单独在运行没问题,接到Unity打包后在Android机子上一运行就退出,特别是那些拿来demo修改一下就用的人好碰到这种情况。检查代码都没有问题。这种情况原因很多,有一个可能性很大,就是在继承UnityPlayerActivity的那个Activity里用了finish函数,把这句删掉就行了,因为继承了UnityPlayerActivity就是Unity程序了,设置时还让它和Unity一起启动的,finish它,就是把你的游戏程序finish了。


2016年3月15日 星期二

Unity infinite scrolling

unity package

模仿Android list view及 Adapter模式及覆寫ScrollRect做的UGUI infinite scoll, 目前還懶得打說明...

2016年3月9日 星期三